by
by 
Wordfence Security is a popular WordPress plugin that has over 3 million active installations. In this guide, we will discuss wordfence settings that can protect your website from brute-force attacks and other hacking attempts.
This is a very important and must-have plugin on your website. It offers many features in the free version. It also provides the 2-factor authentication feature in the free version.
This is part of chapter 5 of the free blogging course that covers a total of 18 chapters from basic to advance.
Now, let’s see the features and wordfence settings step by step.
Page Contents
Features
- It provides firewall and malware scanner
- 2 Factor Authentication required to login to the dashboard
- It identifies and blocks malware
- Wordfence protects you from brute-force attacks by limiting the number of login attempts for a particular IP address
- The malware scanner scans all the themes, plugins, and core files and if it founds any changes in any of the WordPress files then it will show you the malware and the new injected code in highlight.
- It helps to repair a file with a single click option
- Hide WordPress version
- It also offers login CAPTCHA that helps to prevent the website from bots to attempt to login.
- Yes, these are the features available in the free version.
Wordfence Security Settings to Protect a website
1. Install and activate the wordfence security plugin
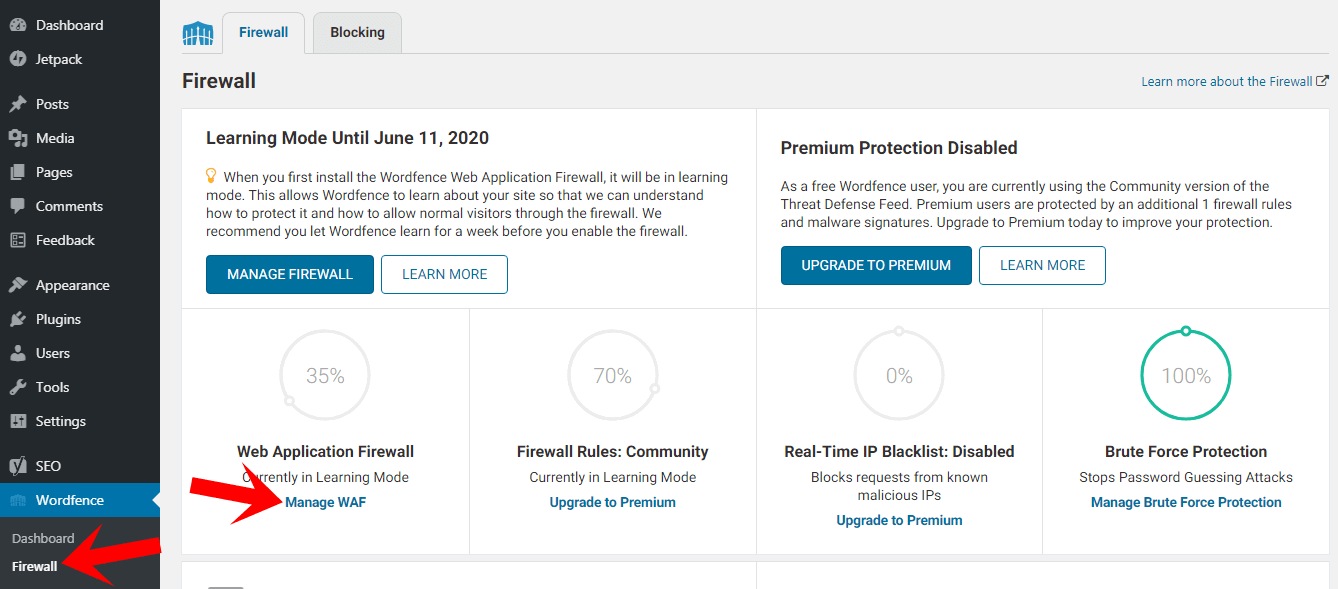
2. Now go to the firewall and then click on manage firewall (see the image below).
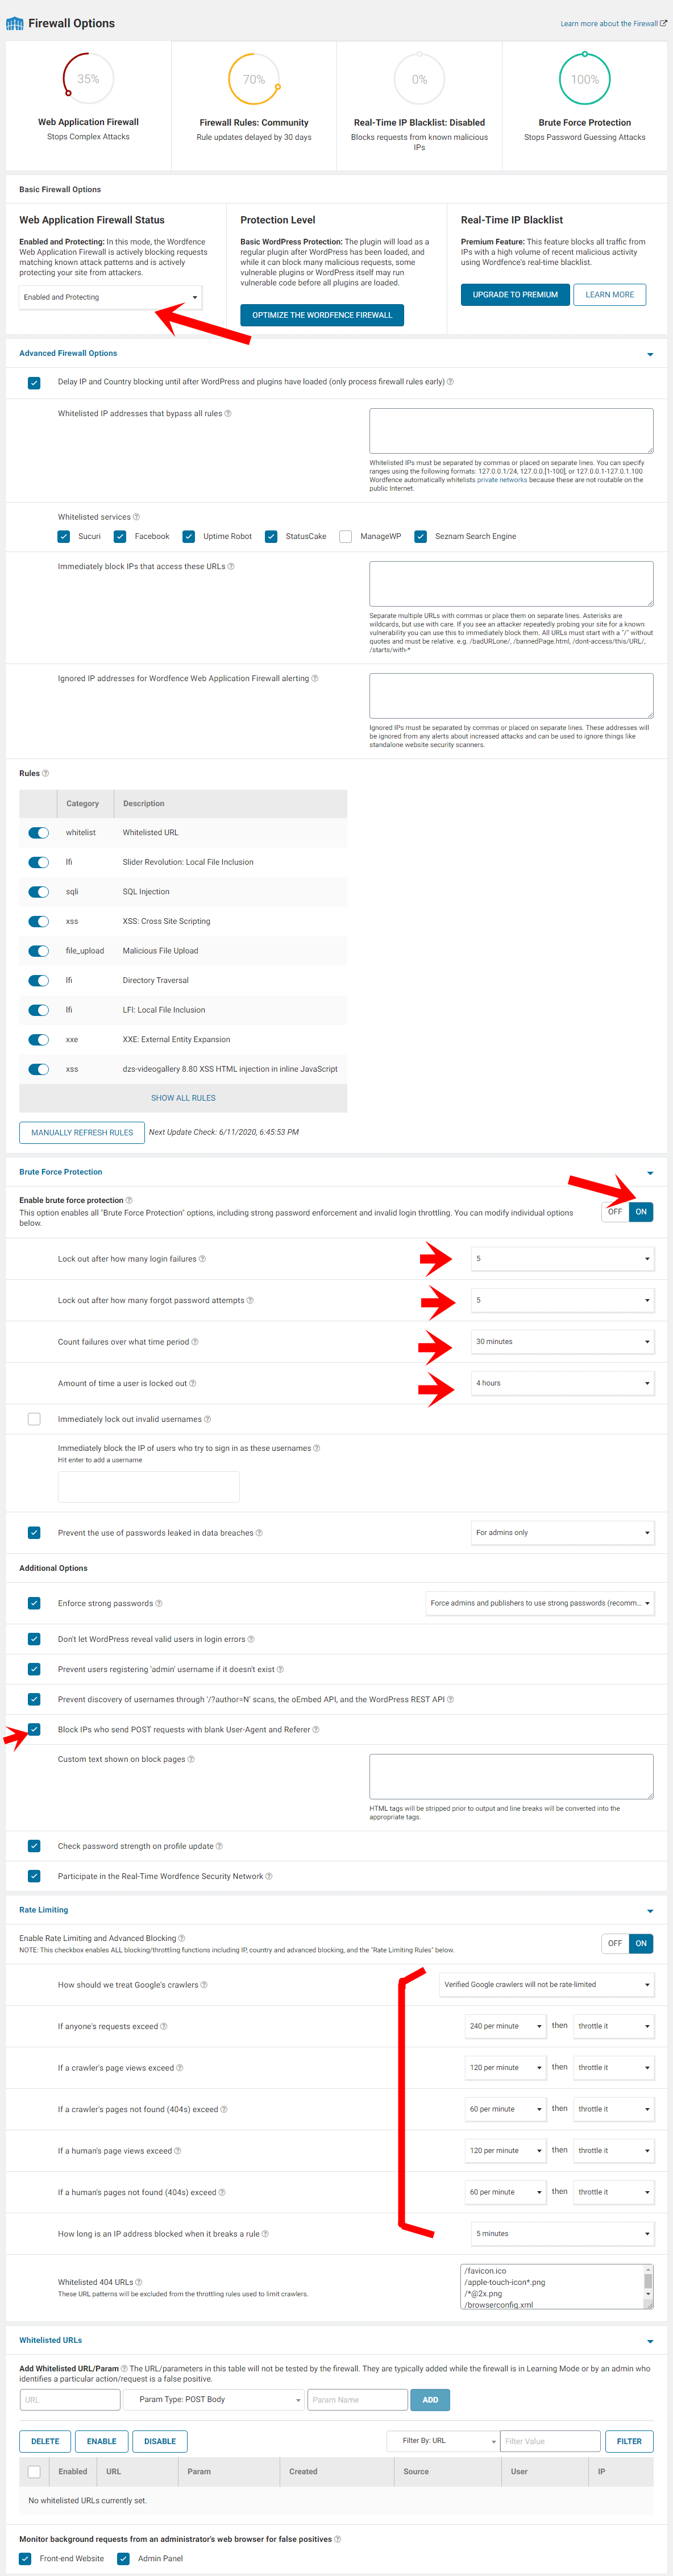
3. Now, You can follow these same settings to setup wordfence security plugin.
- In the basic firewall options, you have to select enabled and protecting for web application firewall status.
- In the advanced firewall options, you can enter your IP address in the Whitelisted IP addresses box so that wordfence does not block your IP address if something unusual activity found.
- Enable brute force protection and in the lockout after how many login failures select 5 or 4. If anyone tries more than 5 times to log in to your website dashboard then he/she will be locked out. Now, in the Lock out after how many forgot password attempt option, Select 5.
- In the option, Count failures over what time period, select 30 minutes. This option specifies the time frame over which wordfence security will count the login failure. For example – we set 30 minutes and 5 failures, If a hacker or anyone fails to sign in 5 times during a 30 minutes period, he will be locked out from login.
- Set 4 hours for the amount of time a user is locked out. You can set the time even more or less depending on you.
- Now, scroll down and Turn on/tick mark the option: Block IPs who send POST requests with blank User-Agent and Referer
- Turn on rating limiting and you can set all the options exactly the same as we did (shown in the image below).
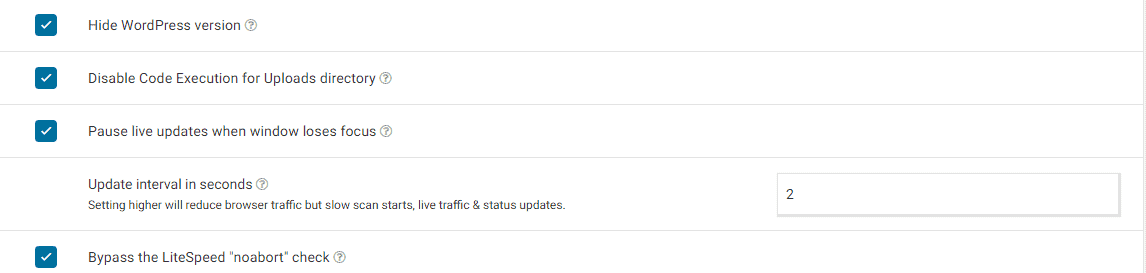
4. Now, go to all options in the wordfence security. Scroll down and you will see general wordfence options. In that, you have to enable hide WordPress version, disable code execution for uploads directory, and Bypass the LiteSpeed “noabort” check.
Steps to Setup 2 Factor Authentication (2FA)
1. To set up 2-factor authentication on your website you need to download TOTP-based (The time-based one-time password) apps like Google Authenticator, FreeOTP, and Authy on your phone.
2. Install any app that you want.
3. Click on login security (You will see this option in the left sidebar in the wordfence settings).
4. Now, you will see the bar code in the left side and recovery codes on the right side. The first thing that you need to do is download the recovery codes. Now, open the Google authenticator app and scan the barcode. If you are unable to scan the barcode then you can write the key written below the barcode in the Google authenticator app.
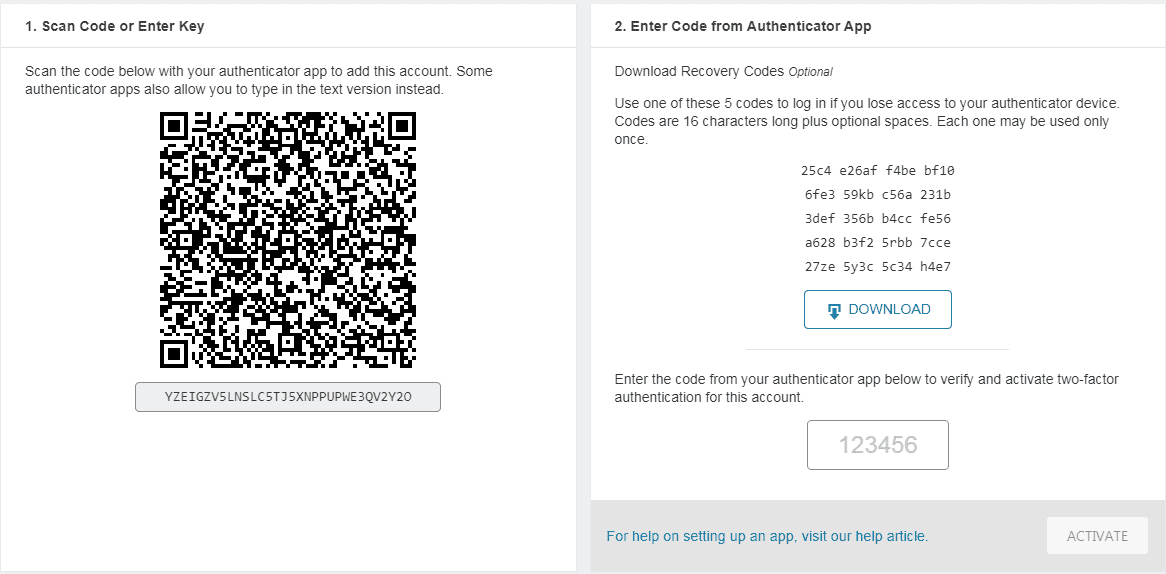
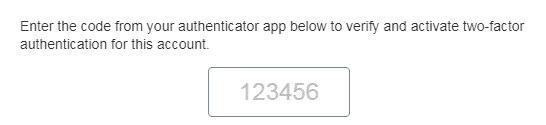
5. Now, you will see a code on your screen. You have to type that code in the box (shown in the image below) to verify and activate 2FA on your website.
Enable reCAPTCHA on Login and Registration Form
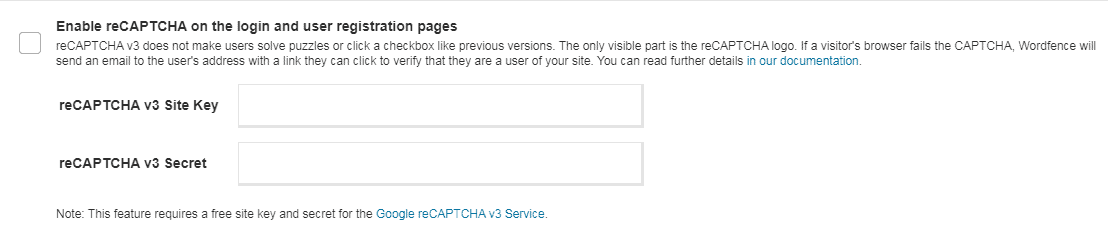
Wordfence also provides Google reCAPTCHA v3 feature on the Login and Registration pages which makes website more secure and prevent bots from login attempt. Let’s see how you can set up reCAPTCHA on your website.
1. When you click on the option login security, then at the top you will see two options: Two-factor authentication and settings. You have to click on settings.
2. Now, scroll down and you will see the option to enable reCAPTCHA. To enable reCAPTCHA you need to get free site key and secret key from Google to use this feature. Click on the Google reCAPTCHA V3 service in the blue color to go to the official website where you can get the site key and secret.
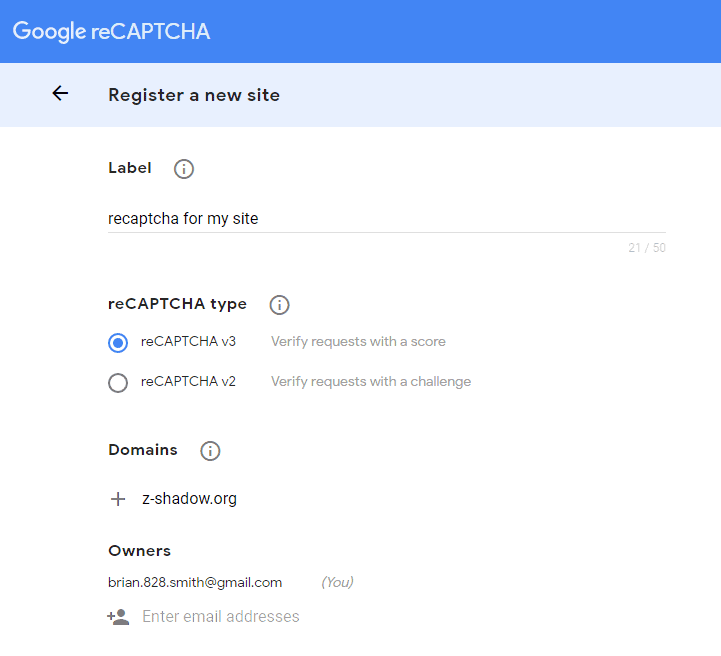
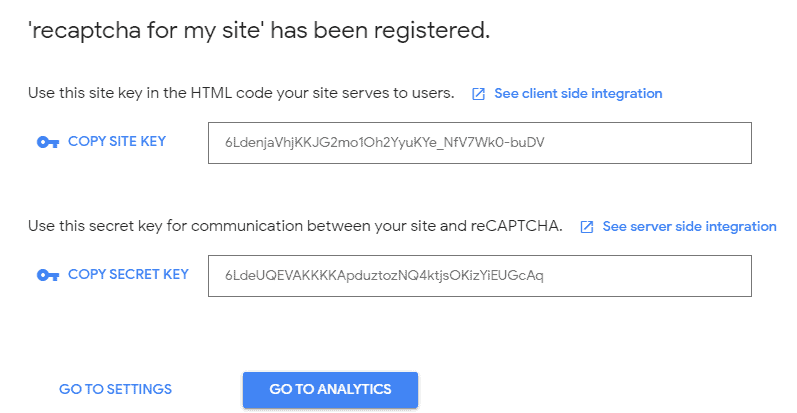
3. In the label type any name, select reCAPTCHA v3, and in the domain enter your domain name. Scroll down and you will see the option to submit. Click on that.
4. That’s it, we have got the site key and secret key. The next task is to paste both site key and secret key in the wordfence reCAPTCHA settings (see the above image for reference) and don’t forget to tick on enable reCAPTCHA on the Login and registration pages.
Related Topics:
- Yoast SEO Settings – Step by Step Guide with Images
- Rankmath SEO Settings – Step by Step Guide with Images
- Classic Editor vs Gutenberg Editor: Which one you should use, comparison and features
- Akismet Anti Spam: Protect your website from Spam (Activation of a free account with images)
- Contact form 7 settings to receive messages from the contact page of your website
- Woocommerce Settings for an Online Store/E-Commerce Website
- Hide wp-admin and replace it with other URL
- Really Simple SSL Setup to fix mixed content issue
- Jetpack Settings – Complete Setup With Images (Explained)