by
by 
Chapter 4 – How to setup a WordPress website.
In chapter 1, We have already discussed what is a blog, how to start a blog for a beginner, how to buy a domain name and hosting, starting a free blog, and FAQ.
In this chapter, we will discuss how to build a WordPress website, Installing WordPress on a new domain, Installing a theme and all the necessary plugins, Important Settings in WordPress, and an overview of the WordPress dashboard.
Now, Let’s start this chapter on how to set up a WordPress website. This is an important chapter so, read it till the end.
Page Contents
How to Setup a WordPress Website
Before starting this chapter we would recommend you start reading from chapter number 1. So, that you can understand everything from basic to advance easily. Now, Follow these steps to build a WordPress website easily.
Installing WordPress
After purchasing a domain name and hosting from a reputed and reliable company like Bluehost. The next task is to install WordPress. Many big hosting companies provide one-click easy WordPress Installation.
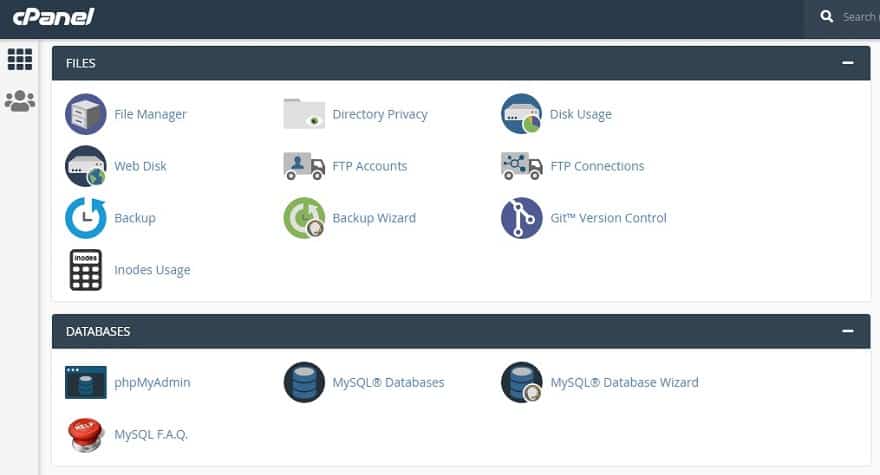
1. Open the website of your web hosting company. Log in to your account and now open cPanel. If cPanel is not available in your web hosting and you are unable to install WordPress then you can ask customer support to help you to install WordPress. Your shared hosting cPanel will look like this in the image below.
2. Now, scroll down your screen and you will see Softaculous App Installer. Using this you can install WordPress in a single click. Click on the WordPress icon.

3. When you click on the WordPress icon, a page will open in which you can see the Install Now button. Click on install now. Now carefully see these settings because these settings are important for WordPress security as well.
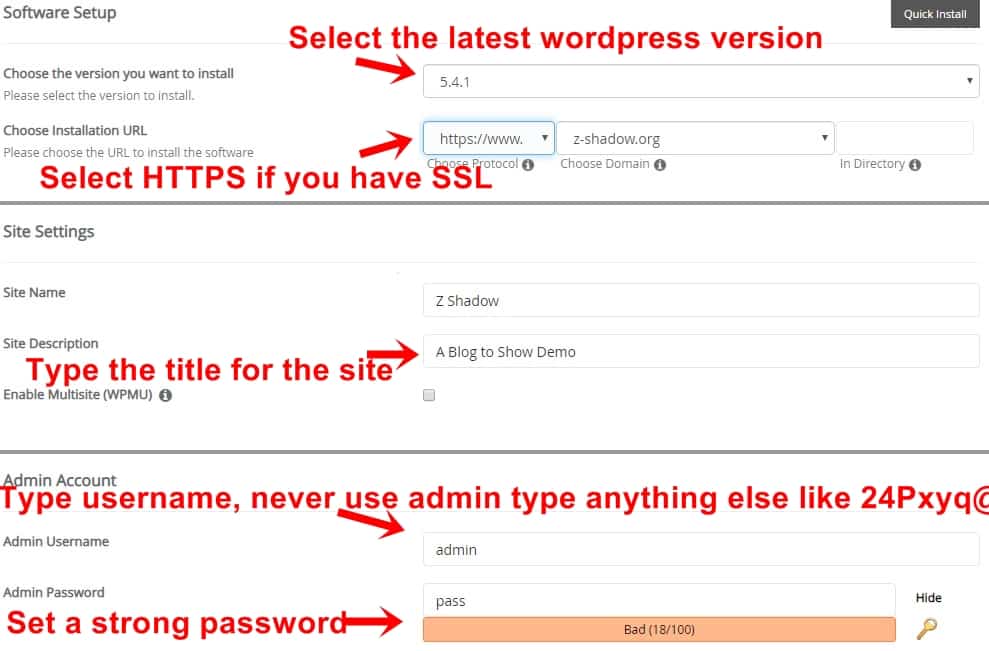
- Always use the latest version when you are going to install WordPress
- If you have an SSL certificate then select https://www. But if you don’t have an SSL certificate then you can use Cloudflare free SSL certificate
- Type the name of your website
- Type the title for your website in the site description. When you search for usersadvice in any search engine you will see our title is guides and reviews.
- Never use the default username that is an admin. It is very important to change this default username because hackers can try brute force attacks and the first guess for the username is admin. Therefore, we suggest using a combination of uppercase and lowercase letters, numbers, and special characters (such as #, $, *).
- Always set a very strong password
- In the admin email option, you can also use your google account email.
4. Now scroll down and you will see advanced options. In that, you have to change two things database name and table prefix. It can be important for WordPress website security because hackers can use automated codes for SQL injection. Therefore difficult table prefix and DB name make it difficult for a hacker to guess the name.

5. Now, scroll down the screen and select a theme then click on the Install button. It will take few seconds to install WordPress depending on the speed of your Internet.
6. Now, the website is live.
Important WordPress Settings
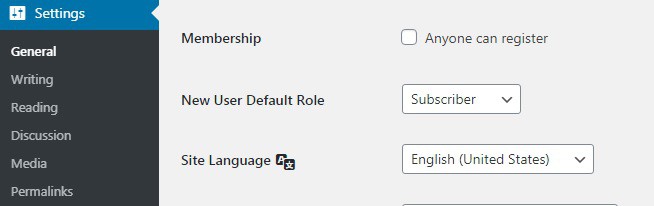
1. General
Click on the settings and then click on general. Scroll to membership and make sure that you are not allowing anyone to register to your website. If you are allowing anyone to register then the role of the new user should be a subscriber. But there is no problem if you allow any user to subscribe to your website membership.
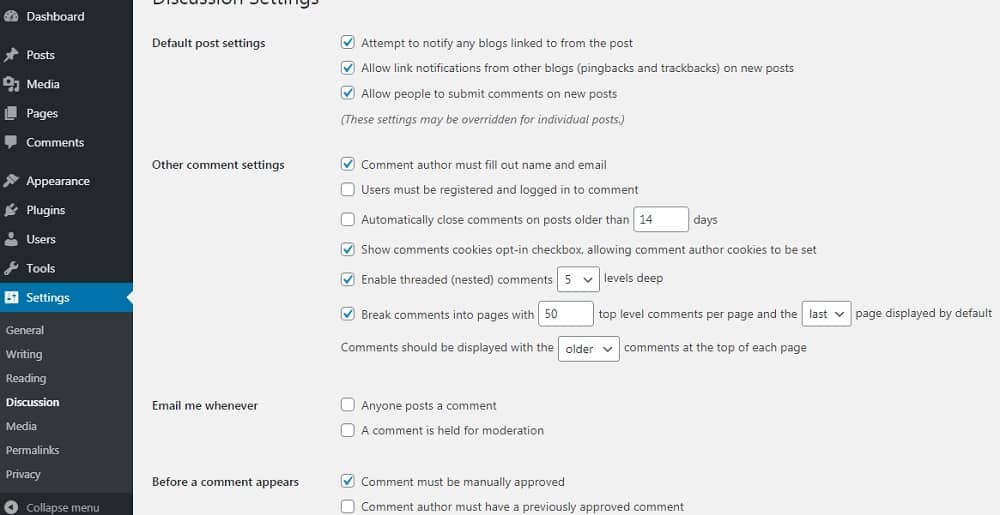
2. Discussion
Now, go to the discussion and do the same settings as in this image. In this discussion settings, we have selected break comments into pages because it is good for fast page loading. We have also selected the comment must be manually approved.
We have deselected two options and they are anyone can post a comment and A comment is held for moderation. If you want to enable this then you can select them but when someone it will be annoying when you receive too many comments daily and your email will be flooded with this notification. This is the reason we suggested you to turn it off.
3. Permalinks
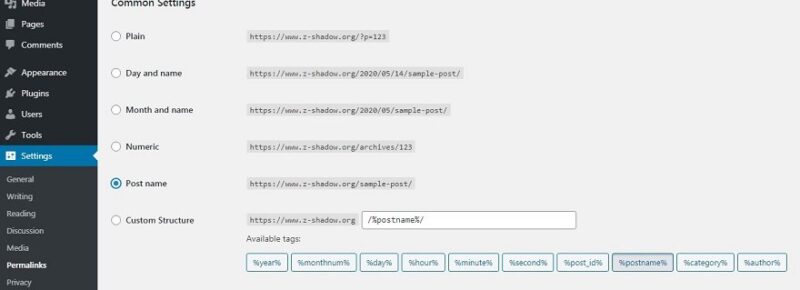
In the WordPress website dashboard, you will see settings. Click on the settings and then click on permalinks. Now, you have to select the same settings as in the image below. Click on post name and then click on save changes. It is important for SEO because the URL structure in this setting is SEO friendly.
Installing theme
If you don’t like the default WordPress theme then you can add a new theme to your website. There are plenty of free themes available. Follow these steps to install a new theme.
1. Go to your WordPress dashboard
2. Click on the appearance and then click on the themes.
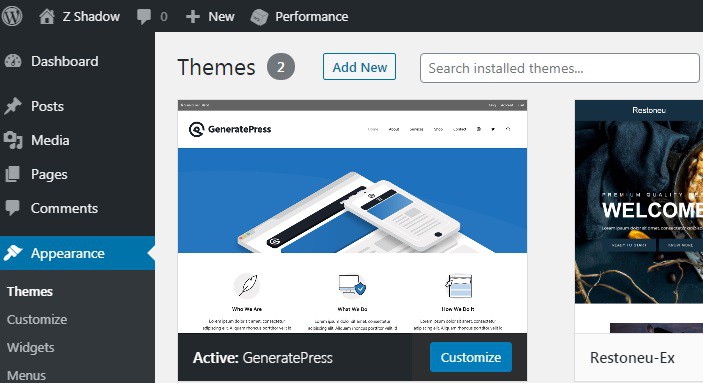
3. Click on the add new button. Now, you will see a lot of themes. You can see all the latest, popular, favorites, and featured themes.
But we will suggest using lightweight themes like generate press, Astra, etc. These two themes are best for SEO. These themes are fast and they take fewer database requests when compared to other themes.
But if you want a good looking theme then you can try generatepress premium version in which they offer different designs and all the designs are made for super-fast page loading, lightweight, and ready for SEO.
Installing all the necessary and Important plugins
Move your mouse over Plugins and then click on add new. Now, you will see plenty of plugins. You can install any plugins from here.
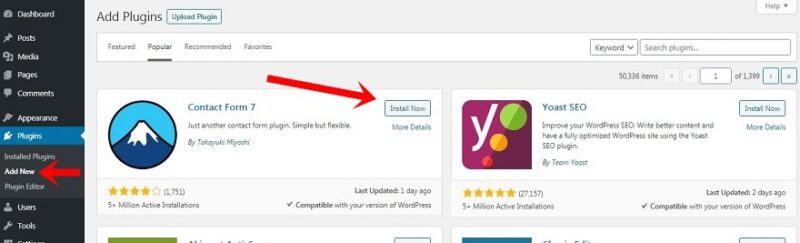
These are some important plugins that you should install. You can read chapter 5 in which we have discussed the best settings for all these plugins. We suggest you install limited plugins which are useful for your work. Installing too many plugins can slow down your website and especially if you are on shared hosting. If you are using between 10 – 24 plugins on your website then it is good.
1. Yoast SEO or Rank math SEO
Yoast SEO is the most popular SEO plugin while Rank math SEO is a new plugin that was started in the year 2019. Rank math offers many extra features that Yoast SEO plugin is not offering in their free version. Both are good plugin for SEO and you can install either of these two plugins. But do not install both plugins.
2. Classic editor
It is easy to use but the new WordPress editor has much better features than the classic editor. We are using the new default WordPress editor (Gutenberg editor).
3. Akismet Anti Spam
A very useful and important plugin to control spam comments on your website.
4. Contact form 7
It makes a beautiful contact form that makes business or any other users contact you easily.
5. Woocommerce
You can install this plugin only if you are going to make a store or e-commerce website.
6. Elementor
If you want to build customized beautiful web pages on your WordPress website then this plugin is the best.
7. Really Simple SSL
You can install this plugin only if you are getting mixed content error or when it shows not secure even if you have installed the SSL certificate.
8. Wordfence Security
Most important plugin for website security. It is the best WordPress security plugin that provides features like 2-factor authentication, protection from brute-force, and many other features this plugin is providing.
9. Updraft
Best plugin for automatic and manual backup in a single click.
10. WP super cache or W3Totalcache
Both are the best plugin for the cache you can install anyone from these two plugins.
11. Mailpoet
Whenever you published a new post on your website this plugin will send the mail to your all the subscribers automatically.
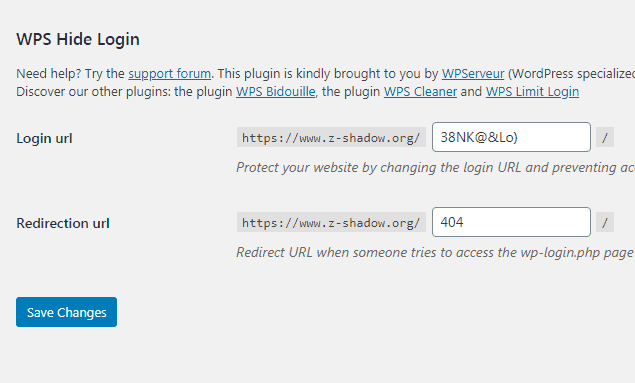
12. WPS Hide Login
It protects your website wp-admin page and hides wp-admin by replacing with other URL.
13. Ad Inserter
Best plugin to insert Adsense ads or any other company ads easily. There are lots of option available in this plugin to show ads o
How to use copyright-free images in blog posts
You can read these 3 ways to use copyright-free images. If you are starting a blog then you must know which images you can use on your website otherwise you will be in copyright trouble. These are the best websites that provide copyright-free images and you don’t require to give a link back to these websites or to the authors.
- Pixabay – we mostly use Pixabay it is completely free and you can download any image from this website to use on your blog.
- Unsplash – This is pretty much similar to pixabay and there are a lot of images available on Unsplash. You can find images for your travel, tech, business, money, career, or any other blog easily.
- Pxhere – It is another great website for using any image for free. If your image is not available on pixabay and unsplash you can check it on pxhere. So, these are 3 are the best websites for copyright-free images. You do not require attribution to use the images from these 3 websites.
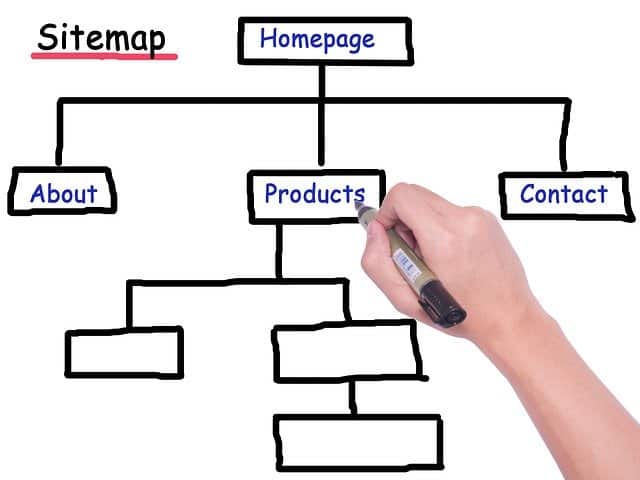
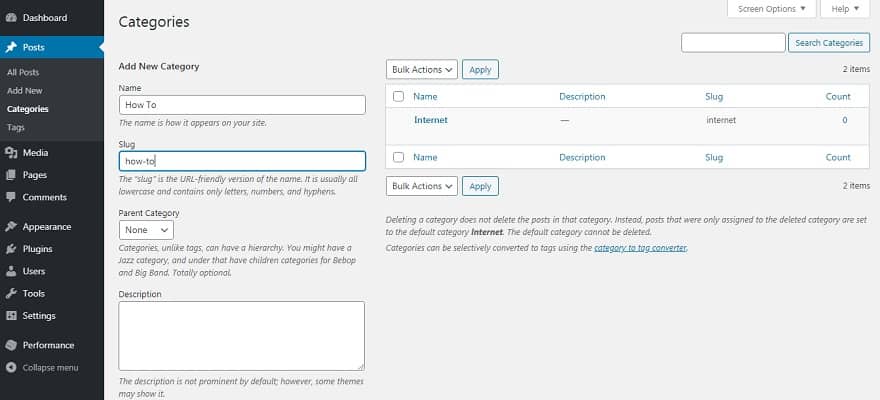
Create Categories for a WordPress Website
Creating categories is easy. To create different categories in WordPress follow these steps.
1. Click on posts and then you will see categories, Click on categories. Now, you need to write a category name and type the slug. For example – I want to create a category of How To. So, in the name box, I have to type How to.
Now, what is a slug? It is a part of the URL of a website that helps to identify particular posts and pages of a website. For example – If you want to open guides category of usersadvice then the URL is usersadvice.com/guides. In this URL slug is guides.
After typing the name and slug click on add New category. You can also add the description for your category. But I usually prefer to leave it blank. But if you want to write something then you can.
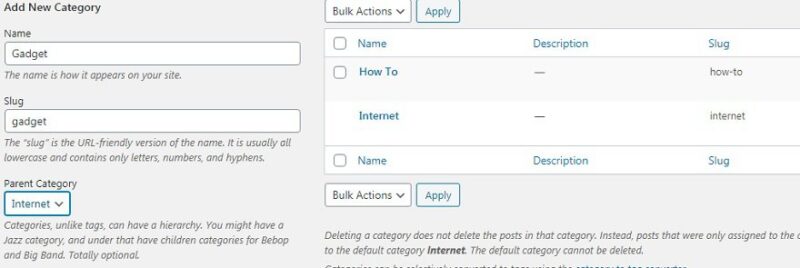
2. Now, what is a parent category? Using the parent category you can make a sub-category of a particular category. See this image in which we are going to create a Gadget category and the parent category is Internet. So, gadgets will be the sub-category of the Internet category.
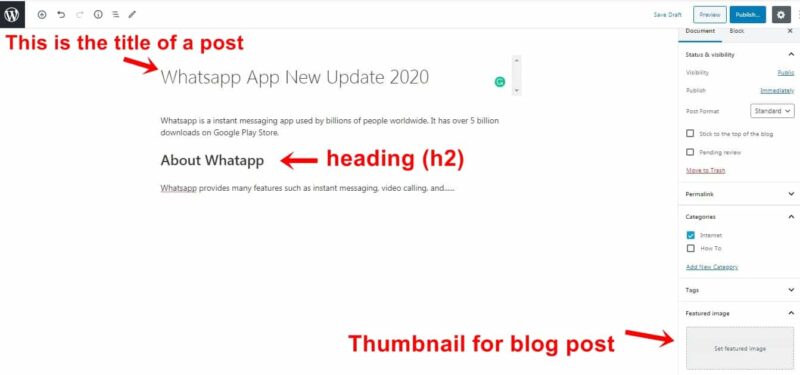
Adding a New Post
We have discussed how to write an SEO friendly post in chapter 8. In this post, we will discuss how you can create a new post and publish it on your website.
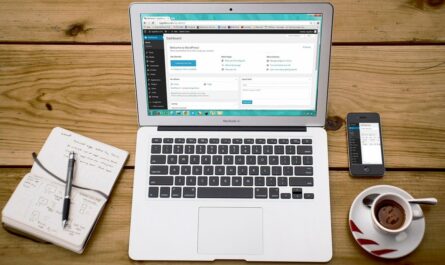
For a blogging website, Blog posts are important because content can generate organic traffic from search engines. To add a post you have to click on posts and then click on add new. Below is the image of WordPress editor where you can write blog posts and publish them.
Adding a New Page
To add a new page to your website. Click on pages and then click on add new pages. If you are starting a new blog then you should make these three pages for your website
- About
- Privacy policy
- Contact Us
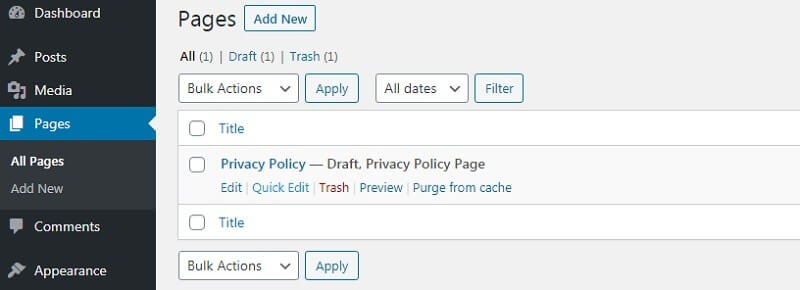
WordPress provides an already written privacy policy for every WordPress website, you can see the image below. So, you can publish the same page as it is or If you want to make some changes or to add extra points then you can edit it and then publish this page. Delete the sample page from your website as this page is only for the demo purpose.
Create Menu for Header and Footer
Most of the websites have two or more than two menus. One menu is for categories and the other menu is for pages (about, contact us, privacy policy). But if you want to create more than two pages than you can also do it.
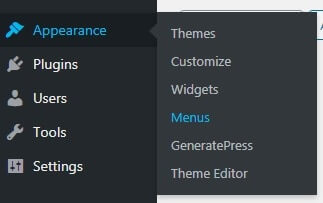
1. Creating a menu in WordPress is easy just follow these steps to create a menu for your website. Go to appearance and then click on menus.
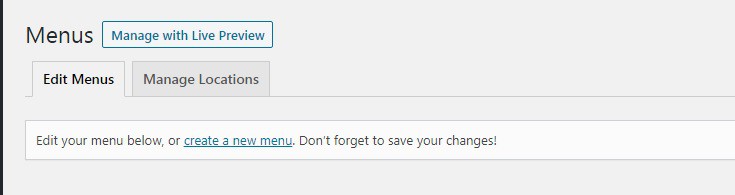
2. In the menus, You will see an option to create a new menu. You have to click on it.
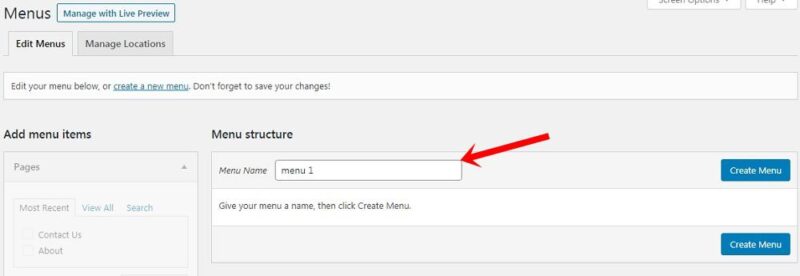
3. Now, give a name to your menu. I have given the name menu 1 and on this menu, I will add all the categories. You can give any name to your menu. Now, click on the create menu.
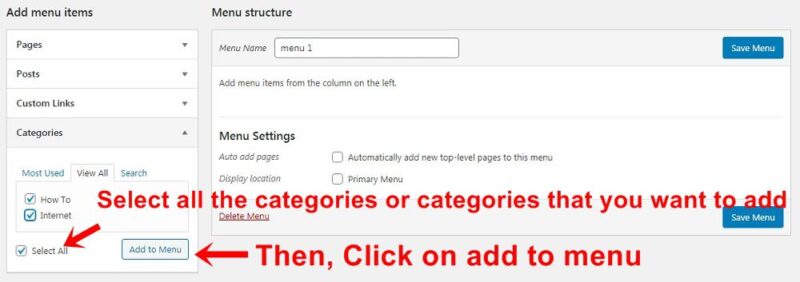
4. To create a menu that contains all the categories, click on categories, and then select all categories. Now, click on add to the menu. After adding all the categories click on the save button. You can also add pages on this menu or You can create a separate menu for pages. By using this way, you can create a menu for all your pages (About, privacy policy, contact us).
How to add Home Button on the menu?
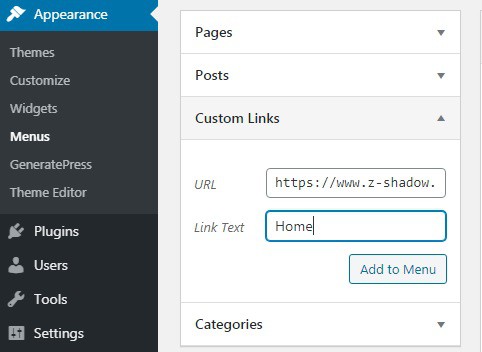
To add the home on your menu. Go to appearance and then click on the menus. Click on custom links and in the URL, type the URL of your website and in the link text write Home. Now, click on the add to menu option.
How to display the menu on the homepage and other pages of the WordPress Website?
1. Now, we need to display the menus on our website. To display the menu on the header or footer of a website. Go to appearance and then click on menus. In the menus, you will see the option to manage locations (at the top). Click on that.
Then, you can select which menu you want to use to display at header and footer. We are using generatepress theme in this tutorial and it supports only one menu at the header.
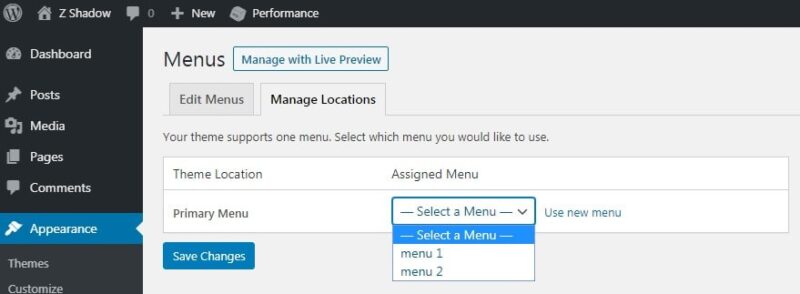
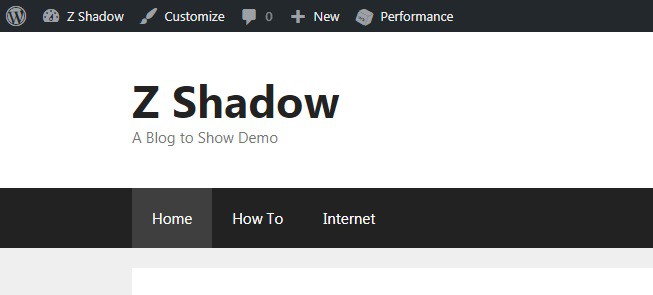
2. After selecting the menu. Click on save changes. Now the menu is visible on the homepage.
How to Remove Powered by WordPress Link and theme name from Footer
Themes like Astra, schema lite, and many other WordPress themes provide an easy way to remove powered by WordPress link and theme name from the footer. In which you have to click on the customize button and then from the footer, you can easily remove the theme name.
But not all the themes provide the same options. So, you have to remove it from the footer.php file. You can find the footer.php file by clicking on the appearance and then click on the theme editor. In the theme editor, you will find the footer.php file.
You have to do it carefully. Before doing this, we will suggest you copy all the code of the footer.php file and paste it into Notepad++. You have to find the code and then delete that code from the footer.php file and then click on the update file.
Overview of WordPress dashboard
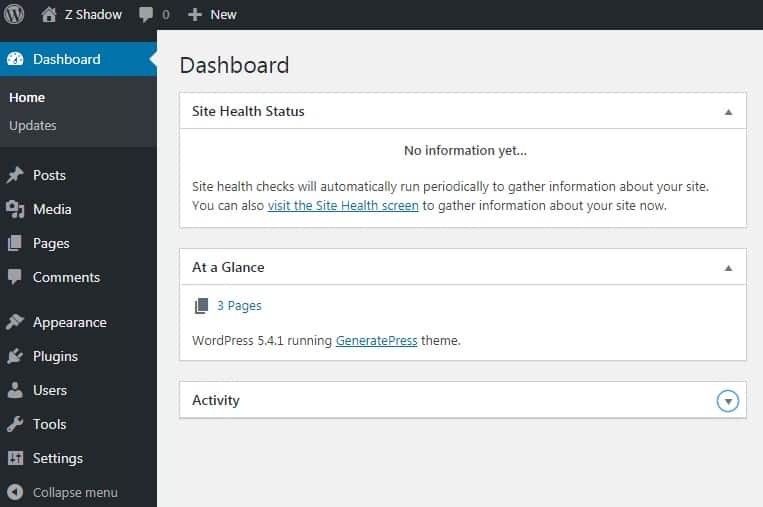
1. Posts
From this option, You can see all the published posts and draft, you can add a new post, view the previous post, edit old and new posts, and add new categories.
2. Media
In the media, you can see all your uploaded photos, videos, audio, documents, files, archives, and spreadsheets.
3. Pages
In the pages, you can see all the published pages on the website and for adding a new page you have to click on add new.
4. Comments
You can see all the approved, held for review, and spam comments on your website.
5. Appearance
In the appearance section, you can add a new theme, customize your theme, create menus, adjust the widget, and you will find the theme editor option. In the theme editor, you will find all the files of your WordPress themes such as header.php, footer.php, CSS, etc.
6. Plugins
You can see all the installed plugins from here and to add a new plugin you have to click on add new. You can easily find the setting for most of the plugins from here, you can uninstall a plugin and there is an option of plugin editor to edit any particular plugin.
7. Users
You can see all the admin users, editors, authors, contributors, and subscribers in the users.
cPanel Overview
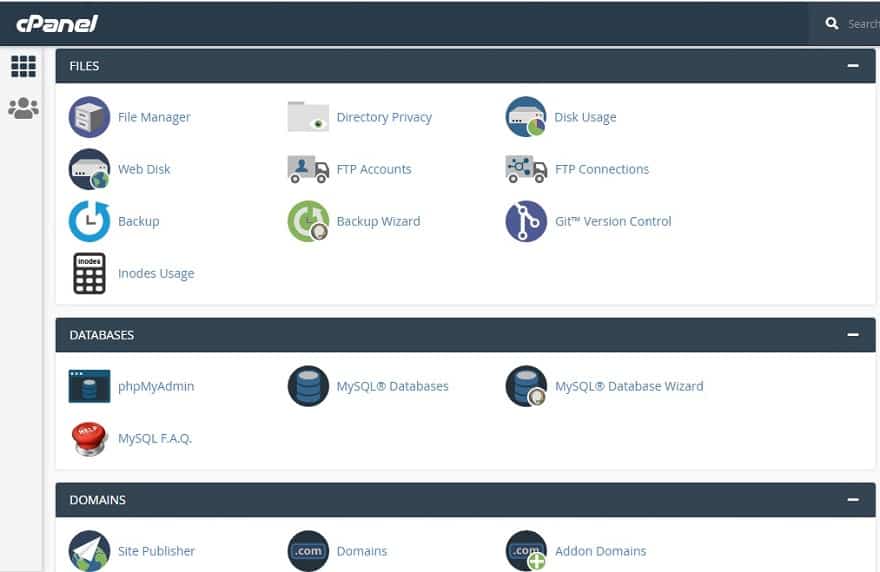
Most of the hosting services provide cPanel in their shared hosting plans. You can see the above image of cPanel. From your cPanel, you can see all the files of your WordPress website, you can take manual backups, check MySQL databases, manage SSL certificate, and lot more things.
If you want to see all the files of your WordPress website then click on file manager and then click on the folder public_html to see all the files.
FAQ
These are some commonly asked questions on how to setup a WordPress website. You can read them if you have any doubt or leave a question in the comment section.
How much time it will take to build a WordPress website?
It can take between 2 – 10 days depending on which type of WordPress website you are building. For a normal blog to post information, guides, and tutorials it can take 1-2 days only.
How to build a WordPress website from scratch?
We have provided a total of 18 chapters from basic to advance to build a WordPress website from scratch. You can start reading chapter wise tutorials.
Where can I find WordPress complete tutorial for beginners for free?
You can check this link to start learning SEO, blogging, WordPress, how to setup a WordPress website, and a lot more things for free.